Concrete Slump Test | Principle of Slump Test | What Is Slump Test ? | How to Measure Concrete Slump? | Slump Test Results | Concrete Slump Test Procedures |
Table of Contents
Concrete Slump Test
The aim of a concrete slump test or slump cone testing is to measure the workability or quality of a concrete mix formulated mostly in a lab or even on the construction site while the work is being done. Concrete slump tests are performed from different batches to ensure that the condition of the concrete is consistent during production.
The slump test is the most basic workability test for concrete because it is inexpensive and produces instant results. As a result of this, these have been commonly used for workability testing since 1922.
The slump is performed in accordance with ASTM C143 in the United States, IS 1199 – 1959 in India, and EN 12350-2 in Europe. In particular, the concrete slump value is used to measure workability, which means the water-cement ratio, although other considerations such as material properties, mixing processes, dosage, admixtures, and so on all have an impact on the concrete slump value.
Principle of Slump Test
The slump value of concrete is only a gravity flow theory of the concrete cone’s layer which shows the volume of water applied to it, indicating that much of this concrete blend is in feasible conditions.
What Is the Slump Test ?
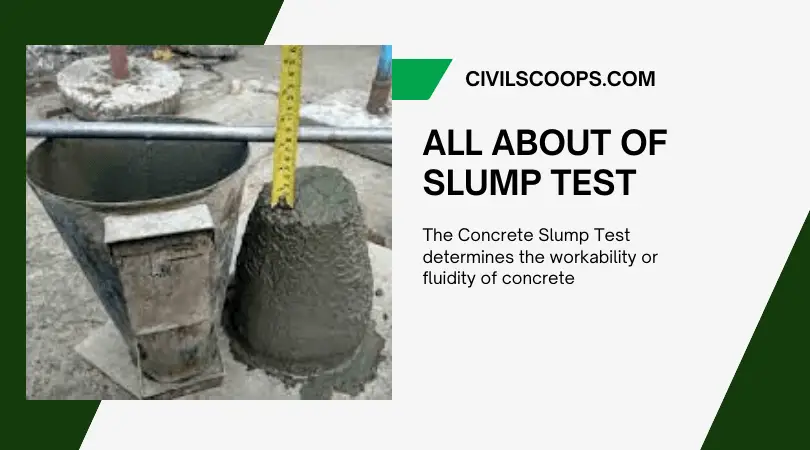
The Concrete Slump Test determines the workability or fluidity of concrete. It is an informal indicator of the consistency or hardness of concrete. Slump testing is a technique for determining the strength of concrete. The hardness or consistency of the blend shows how much water was used. The hardness of the concrete blend should be suited to the final product consistency criteria.
The Following Causes Have an Effect on Concrete Slump Value:
- Water –cement ratio of concrete.
- The coarse and fine aggregate consistency, form, moisture content, texture, and grading.
- The use of plasticizer, superplasticizer admixture, and the order in which they are mixed.
- The air volume of concrete and the void ratio of concrete.
- The time of the test after the concrete has been mixed.
How to Measure Concrete Slump?
The test should be repeated if a shear or collapse slump happens. We will obtain the outcome of the only real slump. According to the slump meaning, we can classify the outcome into certain ranges.
- A slump value of 0 – 25mm (or 0-1 inch) indicates very poor workability.
- A slump value of 25 – 50mm (or 1-2 inches) indicates poor workability.
- Slump value 50 – 100mm or 2-4 inch, medium workability.
- Slump value 100 – 175mm or 4-7 inch; high workability.
Slump tests, as according to P. Bartos’ ‘New Concrete,’ can be graded as follows:
- There is no recession: the slump value is 0 mm or 0 inches.
- Very Low: slump value of 5-10 mm (0.25-0.5 inch).
- Low: slump value of 15-30 mm (0.75-1.25 inch).
- Medium: slump value of 35-75 mm (1.5-3 inch).
- High: slump value of 80-155 mm (3.25-6 inch).
- Very High: slump value 180 mm (6.25 inch) to collapse.
- 50-90 mm : S2.
- 100-150 mm : S3.
- greater than 160 mm : S4.
While there are several methods of workability rating, the general rule is that a low slump value implies less workability, and a high sump value indicates greater workability.
Slump Test Results

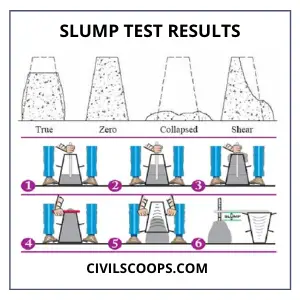
The slump must be estimated in millimetres of subsidence of the specimen during the examination. Any slump specimen that collapses or shears off laterally yields an erroneous outcome, and the procedure should be replicated for another sample if this happens. If the specimen shears again in the repeat test, the slump should be determined, and the fact that the specimen sheared should be registered.
The results of a concrete slump test can be one of the following:
Slumped concrete comes in a variety of sizes, and the slump is classified based on the profile of the slumped concrete.
- Collapse Slump
- Shear Slump
- True Slump
Collapse Slump
In a collapse slump, the concrete totally fails. A collapse slump usually indicates that the blend is too damp or that it is a high workability mix, for which the slump test is ineffective. It indicates that the water-cement ratio is too high, implying that the concrete mix is too saturated or that it is a high workability mix for which a slump test is inappropriate.
Shear Slump
The top part of the concrete shears off and slides sideways in a shear slump.
A shear slump occurs as one-half of a cone slips down an inclined plane. The shear slump means that the outcome is insufficient and that the concrete must be retested for valid results.
- If a shear or collapse slump occurs, a new sample should be taken, and the procedure should be repeated.
- If the shear slump continues, as it does in rough mixes, this indicates a loss of consistency in the blend.
True Slump
In a real recession, the concrete actually subsides, remaining roughly in shape.
- This is the only recession that is seen in different experiments.
- Mixes with stiff consistency have a zero depression, so no difference can be observed between mixes with varying workability in the relatively dry range.
Also Read: What Is Lintel? | Function of Lintel | Types of Lintel
Slump Cone Dimensions
Equipment including Instruments Utilised: The apparatus for performing slump tests is basically a metallic mould in the shape of a frustum of a cone with the internal dimensions as follows:
- 20 cm is the diameter of the bottom.
- 10 cm in diameter at the top.
- 30 cm in height.
- The thickness of the metallic layer for the mould should not be less than 1.62 mm.
- The diameter of the tampering rod is 16 mm (60 cm long bullet-pointed at the lower end).
Concrete Slump Test Procedures

- Add oil to the mould’s internal surface after cleaning it.
- Place the mould on a flat, non-porous horizontal base layer.
- Fill the mould in four roughly equivalent layers with the prepared concrete mix.
- Tamp each sheet in a standardised fashion with 25 strokes of the rounded end of the tamping rod around the cross-section of the mould. Tamping can penetrate into the underlying layer for the following layers.
- With a trowel, remove the extra concrete and level the floor.
- Remove any mortar or water that has spilled out of the mould and the base layer.
- Lift the mould from the concrete in a vertical direction automatically and steadily.
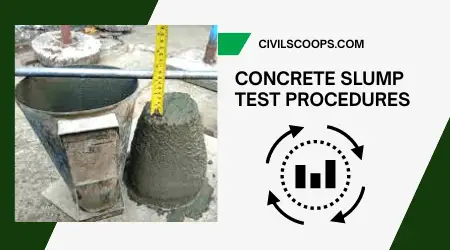
- Slump is described as the difference in height between the mould and the height point of the specimen being measured.
Concrete Slump Chart
[table responsive=”yes” alternate=”yes” fixed=”no”]
| Slump in ( mm ) | Workability of concrete | Application |
| 0 – 1 ( 0 – 25 ) | Very low | Paving devices with high driven vibration use very dry mixes. |
| 1 – 2 ( 25 – 50 ) | Low | Low workability mixes with light reinforcement were used for floors, and the pavements were consolidated using hand-operated vibrators. |
| 2 – 4 ( 50 – 100 ) | Medium | Mixtures of medium workability ; manually consolidated flat slabs Manually placed normal reinforced concrete ; heavily reinforced pieces with mechanical vibration. |
| 4 – 7 ( 100 – 175 ) | high | Concrete with high workability for pieces with congested reinforcement; Vibration might not be efficient. |
[/table]
What Is Slump in Concrete?
- Slump is a calculation of the consistency as well as the fluidity of concrete.
- It depicts the rhythm and general workability of newly mixed concrete.
- To put it simply, the bigger the slump, the wetter the mix. Four-inch (4”) slump is quite popular with standard weight concrete as well as being great for pumping.
- Slumps that really are larger than normal can decrease the concrete’s resilience, toughness, and permeability.
To produce higher slumps while maintaining the consistency of the concrete, using additives rather than water.
[note note_color=”#F2F2F2 ” text_color=”#333333″ radius=”3″ class=”” id=””]
Like this post? Share it with your friends!
Suggested Read –
- Difference Between Coarse Aggregate and Fine Aggregate | What Is Coarse Aggregate? | What Is Fine Aggregate? | Advantage of coarse aggregates | Advantage of Fine Aggregate
- Concrete Vs Cement | Definition of Cement and Concrete | Composition of Cement and Concrete | Types of Cement and Concrete | Properties of Cement and Concrete | Uses of Cement and Concrete | Advantages of Cement and Concrete | Disadvantages of Cement and Concrete
- Concrete Release Agent | Concrete Form Release Agent | Concrete Formwork Release Agent | Concrete Form Release Oil | Concrete Mold Release Agent | Homemade Concrete Release Agent | Concrete Release Agent for Wood | How to Keep Concrete from Sticking to Wood | Fiberglass Release Agent |
- What Are Conceptual Sketches | Concept Sketch Definition | Use of Concept Sketches in Class | Using Concept Sketches in the Field | Architecture Concept Drawings | Difference Between Sketches and Drawings
- What Is Ceramic Tiles? | Advantages &Disadvantages of Ceramic Tiles | What Is Vitrified Tiles? | Advantages & Disadvantages Vitrified Tiles | Differences Between Ceramic Tiles and Vitrified Tiles
[/note]
Originally posted 2021-08-20 06:30:04.

