
Tile spacers are a simple yet crucial tool used in the installation of tiles. They may seem small and insignificant, but their impact on the final result of a tiling project is significant. These small plastic or rubber devices may be overlooked, but their role in creating perfectly spaced and aligned tiles cannot be underestimated. In this article, we will delve into the world of tile spacers, discussing their purpose, types, and best practices for using them in your tiling projects. Whether you’re a seasoned professional or a DIY enthusiast, understanding the importance and proper use of tile spacers is essential for achieving a flawless tile installation.
Table of Contents
What are Tile Spacers? How to use Tile Spacers?

Tile spacers are small, plastic or rubber devices used to evenly space tiles when installing them on a surface. They are typically sold in packs of various sizes and are designed to create consistent, uniform gaps between tiles.
The primary purpose of using tile spacers is to ensure that the tiles are evenly spaced and aligned, resulting in a professional and aesthetically pleasing finish. By creating consistent gaps between tiles, spacers also allow for proper grout application, which is crucial for the durability and longevity of the installation.
To use tile spacers, follow these steps:
1. Prepare the surface: Before installing tiles, make sure the surface is clean, level, and dry. Remove any old tiles, debris, or dust, then spread a layer of tile adhesive using a notched trowel.
2. Place the first tile: Place the first tile at one corner of the surface, applying pressure to make sure it adheres to the adhesive.
3. Insert the spacers: Take two tile spacers and insert them at the two opposite corners of the tile. The size of spacers to use will depend on the desired gap between tiles – typically ranging from 1/8 inch to 1/4 inch.
4. Lay the next tile: Place the next tile directly beside the first one, making sure it is flush with the first tile and the spacers.
5. Repeat the process: Continue laying tiles and inserting spacers until the entire area is covered. Make sure to check and adjust the spacers as needed to maintain consistent spacing between tiles.
6. Let the tiles and adhesive set: Once all tiles are set and in place, let them sit for the recommended drying time, usually 24 hours, before grouting.
7. Remove spacers: After the adhesive has dried, remove the spacers by gently pulling them out from between the tiles.
8. Grout the tiles: Fill the gaps between tiles with grout using a grout float, making sure to remove any excess grout with a sponge. Once the grout is dry, use a damp cloth to clean any remaining residue from the tiles.
In conclusion, tile spacers are an essential tool for achieving a professional and uniform tile installation. With their simple design and easy-to-use application, they ensure the longevity and durability of your tiled surface while adding a polished and visually appealing finish.
Features of Tile Spacers
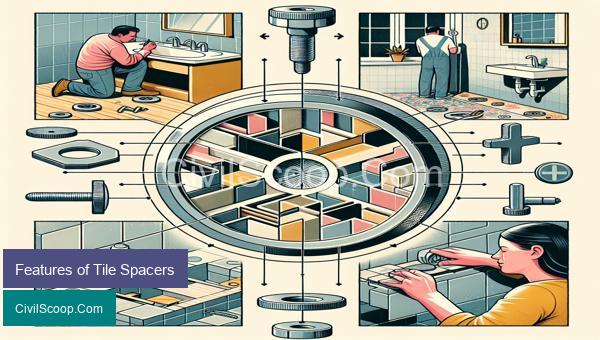
Tile spacers are small plastic or rubber accessories used in the installation of tiles. They are placed between tiles to provide an even gap and ensure proper alignment during the installation process. The use of tile spacers is a crucial step in achieving a professional, precise, and aesthetically pleasing tile installation. In this article, we will discuss some of the key features of tile spacers and why they are important to consider in any tiling project.
1. Consistent Tile Spacing: One of the most important features of tile spacers is that they provide consistent spacing between tiles. They come in different sizes, such as 1/8 inch, 1/4 inch, and 3/8 inch, allowing for different width gaps between tiles. This ensures that the grout lines are uniform and create a clean, polished look.
2. Perfect Alignment: Tile spacers also ensure that tiles are aligned perfectly with each other. Without spacers, it can be challenging to keep tiles straight and in line with the surrounding tiles. This can create uneven and unsightly gaps in between tiles. The use of spacers eliminates this issue and ensures a professional finish.
3. Easy to Use: Tile spacers are lightweight, compact, and easy to use. They can be inserted and removed quickly, making them a convenient tool for both professional installers and DIY enthusiasts. They also come in a variety of shapes, such as crosses, T-shapes, and wedges, to accommodate different tile patterns and layouts.
4. Versatility: Tile spacers can be used for different types of tile installations, including ceramic, porcelain, and natural stone tiles. This makes them a versatile tool for various tiling projects, from floors and walls to backsplashes and countertops.
5. Durability: Tile spacers are typically made of sturdy and durable materials, such as plastic or rubber, to withstand the pressure of tile installation. They can also be reused for future tiling projects, making them a cost-effective and sustainable choice.
6. Reduces Risk of Lippage: Lippage occurs when tiles are not installed with consistent spacing and can lead to uneven surfaces. Tile spacers help to prevent this by ensuring that each tile is uniformly spaced, reducing the risk of lippage and creating a smooth and level surface.
7. Promotes Proper Grout Application: Tile spacers create consistent gaps between tiles, making it easier to apply grout evenly. This results in a clean and professional-looking finish.
In conclusion, tile spacers are an essential tool in the tile installation process. They provide consistent spacing, promote proper alignment, and ensure a professional and aesthetically pleasing result. With their easy-to-use, versatile, and durable features, tile spacers are a must-have for any tiling project.
How to use Tile Spacers

Tile spacers are essential tools for any tile installation project. They are small, plastic or rubber pieces that are designed to fit in between tiles, keeping them evenly spaced and aligned. Whether you are a professional contractor or a DIY enthusiast, using tile spacers can ensure a perfect and professional-looking outcome.
Here are the steps for using tile spacers effectively:
1. Gather your materials: Before you start using tile spacers, make sure you have all the necessary tools and materials. This includes the tile spacers themselves, the tiles, tile adhesive, trowel, and a sponge for grouting.
2. Prepare the surface: The surface where you are installing the tiles should be clean, dry, and level. Use a level to check for any bumps or uneven areas. Make sure to also remove any debris, dust, or old adhesive from the surface.
3. Lay out the tiles: Arrange the tiles in the desired pattern and direction before starting the installation. This will give you an idea of how the final result will look like and help you make any necessary adjustments before you start placing the tiles.
4. Apply adhesive: Using a trowel, spread the tile adhesive over a small section of the surface. Make sure to apply enough adhesive and only work on a small area at a time to prevent it from drying out.
5. Place the spacers: Take the tile spacers and place them at each corner of the first tile. Gently push them into the adhesive to secure them. These spacers will determine the thickness of the grout lines between the tiles.
6. Lay the tile: Place the first tile on the adhesive, pressing it down firmly. Make sure to keep the tile aligned with the spacers. Use a level to check if the tile is straight.
7. Repeat the process: Continue to apply adhesive, place the spacers, and lay the tiles in a row next to the first one. Use more spacers in between each tile for a larger and more even grout line. Use a tile cutter to cut any tiles to fit in smaller areas or around fixtures.
8. Remove excess adhesive: As you lay the tiles, you may get some adhesive squeezed out on the sides. Use a sponge or damp cloth to clean it up before it dries.
9. Let the tiles set: Leave the tiles to set for the recommended time according to the adhesive manufacturer’s instructions.
10. Remove the spacers: Once the adhesive has set, gently remove the spacers from in between the tiles. This will create even and symmetrical grout lines.
11. Grout the tiles: Mix the grout according to the manufacturer’s instructions and apply it using a grout float. Make sure to push the grout into the spaces between the tiles, filling them completely.
12. Clean excess grout: Use a damp sponge to wipe off any excess grout from the surface of the tiles. Rinse the sponge often to prevent smearing the grout. Let the grout dry for the recommended time before walking on the tiles.
In conclusion, using tile spacers is a simple but crucial step in achieving a professional-looking tile installation. Make sure to follow these steps carefully for a flawless finish.
Benefits of Using Tile Spacers

Tile spacers are small, usually plastic, pieces that are placed between tiles during the installation process. They come in various sizes depending on the desired grout width, and are used to create even and consistent spacing between tiles. While they may seem like a small and insignificant tool, tile spacers actually offer numerous benefits in the tile installation process. As a civil engineer, I have firsthand experience with these benefits and have witnessed the advantages of using tile spacers in projects.
1. Ensures even spacing: One of the primary benefits of using tile spacers is that it helps to maintain consistent spacing between tiles. Uneven spacing between tiles can be unsightly and can also affect the performance and durability of the tiles. Tile spacers provide a uniform gap between tiles, ensuring that the tiles are evenly spaced and aligned.
2. Enhances the visual appeal: Properly spaced tiles create a professional and aesthetically pleasing finish. Tile spacers help to create clean and straight lines between tiles, making the overall appearance of the installation more attractive. This is particularly important in areas where the tiles are highly visible, such as in kitchens and bathrooms.
3. Facilitates efficient grouting: Tile spacers help to create uniform gaps between tiles, making the grouting process much more efficient. The consistent spacing allows for grout to be applied evenly and smoothly, resulting in a neat and polished finish. This eliminates the need for excessive grout, saving both time and money during the installation process.
4. Prevents tile movement: During the installation process, it is common for tiles to shift or move before the adhesive sets. Tile spacers help to prevent this movement by keeping the tiles in place. This ensures that the tiles are correctly aligned and that the installation stays on track.
5. Ideal for large scale projects: In large-scale projects, such as commercial buildings or public spaces, installing tiles without spacers can be a daunting and time-consuming task. Tile spacers make the installation process much more efficient and save valuable time. They also ensure that the spacing between tiles remains consistent, despite the scale of the project.
6. Accommodates expansion and contraction: Tiles are subject to expansion and contraction due to changes in temperature and humidity. Without proper spacing, tiles may crack or shift over time. Tile spacers allow for proper expansion and contraction, ensuring that the tiles remain intact and do not affect the overall integrity of the installation.
In conclusion, tile spacers offer numerous benefits in the tile installation process. They not only ensure a visually appealing finish, but also contribute to the performance and durability of the tile installation. As a civil engineer, I highly recommend the use of tile spacers for a professional and efficient tile installation.
Conclusion
In conclusion, tile spacers play a crucial role in achieving the perfect tile installation. From ensuring proper spacing to promoting even grout lines, these small, inexpensive tools have a big impact on the overall look and longevity of your tiled surface. While there are various types and sizes of spacers available, it is important to choose the right ones for your specific project. With proper use and placement, tile spacers can help you achieve a professional and polished finish for your tiling project. So next time you embark on a tile installation project, remember the importance of using tile spacers for a flawless result.