
Landscaping is an essential aspect of creating a visually appealing and functional outdoor space. When it comes to slopes, the terrain can present unique challenges for achieving a lush and healthy lawn. However, with the use of sod, or freshly cut grass with a layer of soil beneath it, homeowners and landscapers can easily install a beautiful and durable turf on slopes. In this article, we will explore all about lay turf with sod in slopes, including the benefits, step-by-step installation process, and maintenance tips to ensure a thriving lawn. So, whether you are planning to tackle a sloped landscape yourself or seeking professional help, read on to discover the ins and outs of using sod for a stunning grassy slope.
Table of Contents
How to Lay Turf with Sod in Slopes?

Laying turf with sod on slopes can be a challenging task, but with the right techniques and tools, it can be done effectively. Here are some steps to follow for laying turf with sod on slopes.
1. Prepare the slope: Before laying sod, it is important to prepare the slope to ensure a smooth and even surface. Begin by removing any rocks, debris, or weeds from the area. Next, use a rake to even out the slope and create a slight incline for water runoff.
2. Install an erosion control mesh: Sod needs a stable surface to establish roots, especially on a slope where water runoff can easily wash away the soil. To prevent this, install an erosion control mesh, such as jute netting or coconut fibers, over the prepared slope. This will help stabilize the soil and prevent erosion while the turf establishes roots.
3. Measure and mark the area: Measure the slope and mark where the sod will be laid out. It is essential to have proper measurements to ensure you have enough sod for the entire area. Use stakes and string to mark the space where the sod will be placed.
4. Lay the first row of sod: Begin laying the sod at the bottom of the slope, starting with the longest edge. Make sure the edges of the sod pieces are tightly placed together, leaving no gaps between them. Use a sharp knife to trim any excess turf to fit into the marked area.
5. Lay subsequent rows: Lay the next row of sod directly above the first row, making sure to stagger the seams like a brick pattern. This will help prevent water runoff from creating channels between the seams. Use a sod roller or a plywood board to press down on the newly laid sod to ensure good soil-to-sod contact.
6. Cut and trim around obstacles: If there are any trees, rocks, or other obstacles on the slope, use a sharp knife or sod cutter to cut the sod pieces to fit around them.
7. Water the sod: As you lay down sections of sod, water them immediately. This will help the roots establish themselves firmly in the soil.
8. Fill in the gaps: After all the sod has been laid, go back and fill in any gaps between the seams with topsoil. This will help the sod establish better and prevent any unevenness.
9. Keep the sod hydrated: Newly laid turf needs to be watered regularly to keep the roots moist. This is especially important on slopes where water may easily run off. Water the turf deeply, ensuring that the water reaches the roots.
Laying turf with sod on slopes can be a time-consuming and physically demanding task, but with the right preparation and techniques, you can achieve a beautiful and healthy lawn. Make sure to continue regular watering and maintenance to help the turf establish and thrive on the slope.
1. Specification of Sods

Sods, also known as turfgrass, are a type of grass that is grown specifically for its use as a surface for lawns, sports fields, and other similar applications. It is often used as a cost-effective and environmentally-friendly alternative to conventional paving materials. The following are some specifications that are commonly used to describe sods:
1. Type of sod:
There are several types of sod available in the market, each with its unique characteristics and uses. Some of the common types include Bermuda, Kentucky bluegrass, and Zoysia. The type of sod must be carefully selected based on factors such as climate, usage, and maintenance requirements.
2. Thickness:
The thickness of sod is an essential specification as it determines the durability and strength of the surface. Generally, for residential lawns, the recommended thickness is between 1.5 to 2 inches. For sports fields, a thickness of 2 to 3 inches is preferred to withstand heavy usage.
3. Grass height:
Sod should be cut to a specific height depending on its use and type. For residential lawns, a grass height of around 1.5 to 2 inches is suitable, whereas, for sports fields, the recommended height is between 1 to 1.5 inches. This specification must be followed to ensure the health and vitality of the sod.
4. Soil composition:
The composition of the soil used for growing sod is crucial as it affects the growth and quality of the grass. Typically, sods require a soil mix that is rich in organic matter and essential nutrients such as nitrogen, phosphorus, and potassium. This ensures healthy root growth and a strong, lush lawn.
5. Watering requirements:
Sods must be watered regularly to keep them healthy and promote deep root growth. However, over-watering can cause issues such as root rot and fungal diseases. The amount and frequency of watering should be specified depending on the type of sod and climate.
6. Delivery and installation:
Sods are usually sold in rolls or pallets and must be delivered to the site promptly to avoid drying out. The installation process must be carried out carefully to ensure the proper joining of sod pieces and adequate soil contact.
7. Maintenance requirements:
Sods require regular maintenance to retain their health and appearance. This includes activities such as mowing, fertilizing, and pest control. The maintenance requirements may vary depending on the type of sod and the site conditions.
In conclusion, the specification of sods is crucial for ensuring the successful installation and long-term performance of this versatile surface material. Proper selection, delivery, installation, and maintenance are essential to achieve a robust and aesthetically pleasing lawn or sports field.
2. Preparation of Earth Bed

The preparation of Earth Bed is an important step in civil engineering, especially in construction projects such as building foundations and road construction. It involves the process of levelling and compacting the ground surface in order to provide a stable base for structures to be built upon. In this article, we will discuss the various methods and considerations for preparing an Earth Bed.
1. Surveying and Stakeout: The first step in preparation of Earth Bed is to survey the area and determine the exact location and elevation of the proposed construction site. This is done using surveying equipment such as total station or GPS. Once the survey is complete, stakes are placed on the ground to mark the boundaries of the site and act as reference points during the construction process.
2. Clearing and Grubbing: The next step is to remove any vegetation or debris from the site. This includes trees, bushes, rocks, and other obstructions. This is important as these can hinder the construction process and affect the stability of the Earth Bed.
3. Stripping the Topsoil: After the site is cleared, the topsoil is removed using heavy machinery such as excavators. Topsoil is the uppermost layer of soil which contains organic matter and is generally unsuitable for construction as it is not compactable and may settle over time. It is important to remove the topsoil to reach the more suitable subsoil layers.
4. Excavation: Excavation is the process of removing earth to reach the desired level and shape of the Earth Bed. It is done using excavators, bulldozers, and other heavy machinery. Excavation is done in layers, with each layer being compacted before the next layer is excavated. This helps to achieve a uniform and stable Earth Bed.
5. Grading: Once the excavation is complete, the Earth Bed is graded to achieve a smooth and even surface. Grading involves spreading and leveling the excavated soil to match the desired elevation and slope.
6. Compaction: Compaction is a crucial step in the preparation of Earth Bed. It involves using heavy machinery such as compactors and rollers to compress the soil and increase its density. This reduces the chances of settling and improves the load-bearing capacity of the Earth Bed.
7. Moisture Control: The moisture content of the soil has a significant impact on its compaction and stability. Therefore, controlling the moisture content is necessary during the preparation of Earth Bed. The soil is sprayed with water and then compacted to reach the desired moisture content.
8. Testing: It is important to conduct tests such as Proctor compaction test and California Bearing Ratio (CBR) test during the preparation of Earth Bed. These tests determine the density and strength of the soil, and the results are used to adjust the compaction and moisture control processes.
In conclusion, the preparation of Earth Bed is a crucial step in civil engineering projects. It involves several processes such as surveying, excavation, compaction, and testing to achieve a stable and strong base for construction. Proper preparation of Earth Bed not only ensures the safety of structures but also increases their durability.
3. Placing the Sods

After the clearing and leveling process, the next step in sod installation is placing the sods. This is a critical step in the process as it directly affects the healthy growth and establishment of the sod. As a civil engineer, I have had extensive experience in supervising and overseeing sod placement for various projects. In this article, I will discuss the importance of placing sods correctly and the best practices to ensure a successful installation.
1. Determine the Direction and Orientation: Before placing the sods, it is crucial to determine the direction and orientation of the sod. This is especially important if the sod is being installed in a large area. The most common practice is to start laying the sods from a straight edge such as a driveway, sidewalk, or property line. This provides a guide for a straight and even line, ensuring a neat and professional look. Additionally, the direction in which the sods are laid should be perpendicular to the slope to minimize erosion.
2. Stagger the Joints: When placing the sods, it is essential to stagger the joints by one-third of the length of the sod. This creates a tight interlocking system, which helps prevent gaps and uneven areas. Staggering the joints also distributes the weight of foot traffic and prevents the roots from being crushed. Moreover, it also provides a more natural and visually appealing look to the sod.
3. Use a Roller: After laying the sods, it is vital to use a roller to compact the soil and ensure that the sod makes good contact with the ground. This helps to eliminate gaps and air pockets, which can prevent the roots from establishing in the soil. The use of a roller also helps to level out any slight bumps or uneven areas, providing a smooth and even surface for the sod.
4. Avoid Overlapping: One common mistake made during sod placement is overlapping. Overlapping occurs when sod is placed on top of already installed sod, resulting in two layers of sods on the same spot. This not only creates uneven surfaces, but it also causes the sod to dry out and die. To avoid this, it is crucial to carefully place each sod and ensure that there are no overlaps.
5. Water Immediately: As soon as the sods are placed, it is crucial to water them immediately. This helps to keep the sod moist and prevents it from drying out. Drying out is a significant cause of sod failure and can lead to expensive replacements. Additionally, watering also helps to flatten out any air pockets, ensuring that the sod makes proper contact with the soil.
In conclusion, proper placement of sods is crucial in achieving a healthy and lush lawn. As a civil engineer, I have learned that following the above best practices is essential for a successful sod installation. Neglecting these essential steps can result in a failed project and costly replacements. Therefore, it is critical to pay attention to detail and follow these guidelines to ensure a beautiful and durable lawn.
4. Staking of Sods
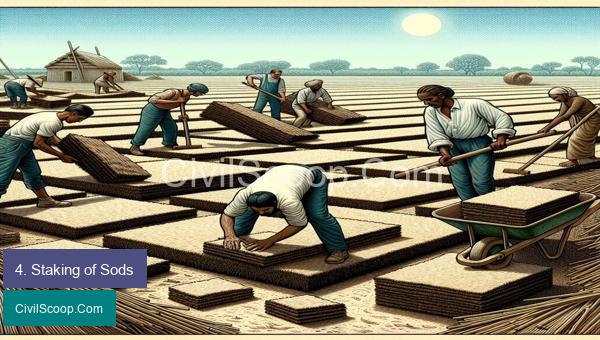
Staking of sods refers to the process of placing stakes on a newly laid sod to secure it in place. It is an important step in the installation of sod as it helps to establish a strong and stable lawn. As a civil engineer, it is crucial to understand the staking process to ensure the long-term success of landscaping projects.
The staking process typically begins after the sod has been properly installed in the desired area. The sod is unrolled, lined up, and cut to fit the area with any contours or curves accounted for. Once the sod is in place, stakes are driven into the ground to secure the edges and corners. The number of stakes required depends on the size and shape of the area, but they are typically placed every two feet.
The type of stakes used for staking sods can vary, but the most commonly used are wooden or plastic stakes. These are typically 12-18 inches long and are driven into the ground at a 45-degree angle. The stakes should penetrate the soil at least six inches for optimal stability. It is crucial to ensure that the stakes are firmly planted in the ground to provide maximum support for the sod.
During the staking process, it is important to smooth out any wrinkles or bumps in the sod and ensure that all edges are straight and in line with the surrounding landscape. This will help to create a seamless and even lawn surface.
Staking of sods is essential for several reasons. Firstly, it helps to prevent the sod from shifting or moving, especially during heavy rainfall or strong winds. This, in turn, prevents the sod from becoming uneven or creating gaps between the edges. Additionally, staking also helps to establish the sod’s root system, allowing it to take hold and establish itself in the soil.
When staking sods, it is important to follow certain guidelines. The stakes should not be placed too close to the edges, as this can cause damage to the sod or create unsightly holes. Additionally, the stakes should not be driven too deeply, as they can puncture the sod and cause damage to the root system.
In conclusion, staking of sods is a crucial step in the installation of new lawns. It ensures the stability and longevity of the sod by preventing shifting and promoting root growth. As a civil engineer, understanding the proper staking process is essential to ensure the successful completion of landscaping projects.
5. Top Dressing of Sods

Top dressing of sods is a common technique used in civil engineering to improve the health and aesthetics of lawns and other turf areas. It involves adding a layer of soil or other organic material to the surface of existing sod in order to address issues such as poor soil quality, turf compaction, and excessive thatch buildup.
Here are five important things to know about top dressing of sods:
1. Why top dressing is necessary:
Lawns and turf areas can become unhealthy and unattractive due to a variety of factors, such as compacted soil, nutrient-deficient soil, and excessive thatch buildup. These issues can result in poor grass growth, unsightly bare patches, and an overall decline in the health of the turf. Top dressing can help to address these issues by adding nutrients, improving soil structure, and promoting a healthy root system.
2. Types of materials used for top dressing:
There are various materials that can be used for top dressing of sods, including topsoil, compost, sand, and peat moss. The specific material chosen will depend on the specific needs of the lawn and the desired results. For example, topsoil can be used to add nutrients and improve soil structure, while sand can help to improve drainage and reduce compaction.
3. The process of top dressing:
The first step in top dressing is to prepare the existing sod by mowing it to a shorter length than usual. This allows for better contact between the new material and the soil. The top dressing material is then applied evenly over the surface of the lawn, typically at a depth of 1/4 inch to 1/2 inch. The material is then worked into the lawn by using a rake or a specialized top dressing tool. Finally, the lawn is watered thoroughly to help settle the new material and promote root growth.
4. Benefits of top dressing:
Top dressing of sods offers numerous benefits for lawns and turf areas. It can improve soil quality and provide essential nutrients for healthy grass growth. It also helps to reduce soil compaction, which can impede root growth and lead to poor drainage. Additionally, top dressing can help to break down thatch buildup, which can suffocate grass and make the lawn more susceptible to disease and pests.
5. When to top dress:
The ideal time to top dress sods is in the spring or fall, when the weather is mild and there is lower water demand for the grass. It is important to avoid top dressing during hot and dry periods, as the new material may dry out too quickly and not provide the desired benefits. It is also recommended to top dress after aerating the lawn, as this will help the new material reach the roots more easily.
In conclusion, top dressing of sods is an effective technique for improving the health and appearance of lawns and turf areas. By adding the right materials at the right time, civil engineers can help to create lush and healthy green spaces that are not only aesthetically pleasing but also more resistant to stress and disease.
6. Watering and Maintenance

Watering and maintenance are crucial aspects of civil engineering when it comes to infrastructure and construction projects. Watering refers to the process of providing moisture and hydration to a given area, while maintenance involves upkeep, repairs, and preservation of structures and systems. Both are essential for the longevity and functionality of any project.
One of the main reasons why watering and maintenance are critical in civil engineering is to ensure the stability and durability of structures. Construction materials such as concrete and steel require a specific level of moisture to maintain their strength and prevent cracking or warping. Proper watering techniques, such as curing, can significantly improve the lifespan of a structure.
In addition to improving structural integrity, watering is also essential for environmental purposes. It helps to control dust and reduce soil erosion, especially in construction sites. Proper watering also promotes plant growth, which can be beneficial in landscaping or infrastructure projects involving greenery.
On the other hand, maintenance is crucial for identifying and repairing any damages or failures in a structure. It is a continuous process that helps to prevent major issues and ensures the safety of the public. For example, regular inspection and maintenance of bridges, roads, and buildings can detect any structural weaknesses or signs of wear and tear before they become critical hazards.
Moreover, maintenance also includes the upkeep of utility systems such as water and sewage pipelines, electrical grids, and communication networks. These systems are essential for the functioning of a community, and proper maintenance helps to prevent disruptions and potentially dangerous situations.
In both watering and maintenance, technology has played a significant role in recent years. Advanced sensor systems can monitor moisture levels and detect any changes, making watering more efficient and precise. Maintenance techniques such as drones and artificial intelligence have also been increasingly used to inspect and assess structures, reducing the time and costs involved in traditional methods.
Civil engineers play a critical role in ensuring proper watering and maintenance techniques are implemented in all construction and infrastructure projects. They must design and plan for reliable and sustainable watering methods, as well as incorporate regular maintenance schedules into their projects. Furthermore, they must also stay updated on the latest technologies and techniques to improve the efficiency and effectiveness of these practices.
In conclusion, watering and maintenance are essential aspects of civil engineering that contribute to the safety, stability, and longevity of structures and systems. It is crucial for engineers to prioritize these activities and adapt to new technologies to ensure the success and sustainability of their projects.
Conclusion
In conclusion, growing and maintaining a lush and healthy lawn on slopes can seem like a daunting task, especially for those without prior experience. However, with the use of sod or turf, homeowners can easily transform their slopes into beautiful, green spaces. With proper installation techniques and regular maintenance, laying sod on slopes can be a cost-effective and easy solution for creating a stunning landscape. By understanding the benefits of using sod, choosing the right type for your climate and soil conditions, and following the proper steps for installation and maintenance, homeowners can achieve a beautiful and durable lawn on any slope. So why wait? Give your sloped areas a transformation with sod and enjoy a beautiful and functional landscape for years to come.